BigCommerce Enrichment
The BigCommerce Enrichment screen is where you can enter host-specific properties, attach your images, and ultimately mark your products as ready to upload.
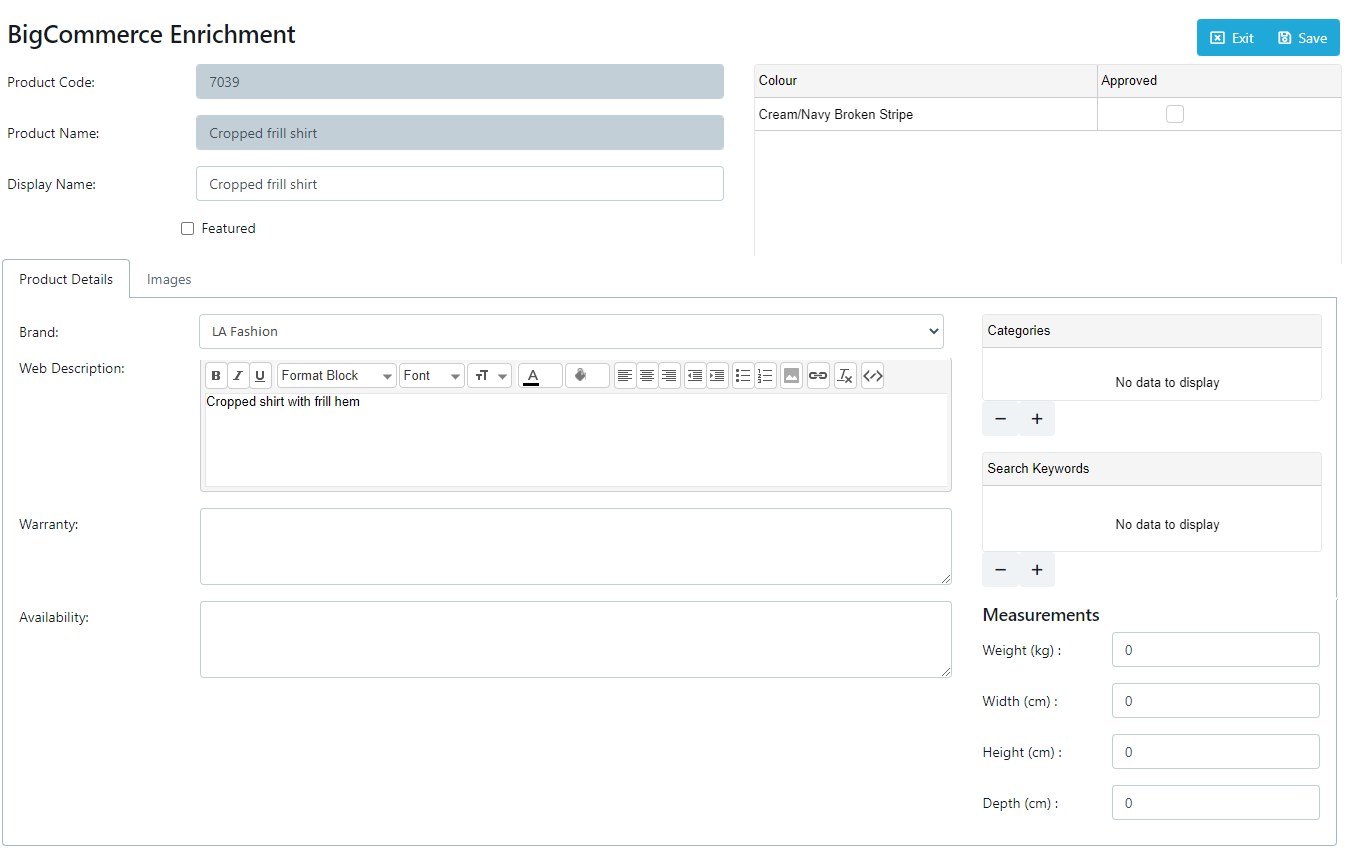
Basic Properties
Display Name
The product's name within BigCommerce, defaults to your uploaded Product Name.
Featured
Marks your product as a 'Featured Product' within BigCommerce. Only to be used at your sponsor's discretion.
Web Description
The product's main description, defaults to your uploaded Product Description.
Allows the use of font-styling, such italics and bold, and formatting such as bullet pointed lists for a more structured and visually appealing description.
Please follow your sponsor's guidelines for web description if available.
Warranty
Warranty information displayed on the product page.
Availability
Availability text displayed on the checkout page, under the product title. Tells the customer how long it will normally take to ship this product, such as: ‘Usually ships in 24 hours.’
Categories
The BigCommerce categories to include your product in.
To add a new category, click the button and select your desired category from the popup-list.
To remove a category, select the category you wish to remove an click the button.
Search Keywords
Keywords you would use when searching for your products.
To add a new keyword, click the button.
To remove a keyword, select the keyword you wish to remove an click the button.
Measurements
The measurements of your product, using the given units of KG and cm.
Images
Images can be attached to your product via two methods, selecting images previously uploaded via the Image File Upload or by uploading new image files or URLs, depending on your companies settings.
In either case, to add a new image to your product, start by clicking the button and selecting one of the two options.
Select Previously Uploaded Images
The following window lists all images uploaded against this product, allowing you to easily check the images you wish to add to your enrichment data.
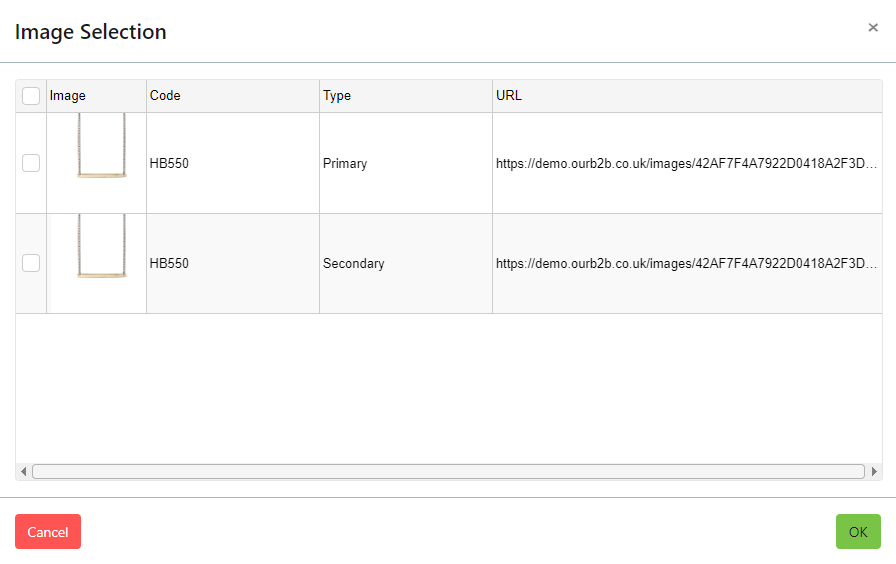
- Select your desired images by clicking the checkbox in the left-most column of the grid.
- Click OK to add the images to your product.
Upload New Image
Depending on the package purchased by your company, the following screen will allow either the uploading of an image file, or the entry of an image URL.
Uploading images can be a slow process. Please ensure the image is of the required size and shape and that it is not larger than required.
If you have images stored in a URL accessible location you can import the URLs and link them to your product saving time and money.
In either case, any images you create via this process will be added to the Product's master image list, meaning if you enrich the same product for another Host the images will be available via the 'Select Previously Uploaded Images' option.
File Upload
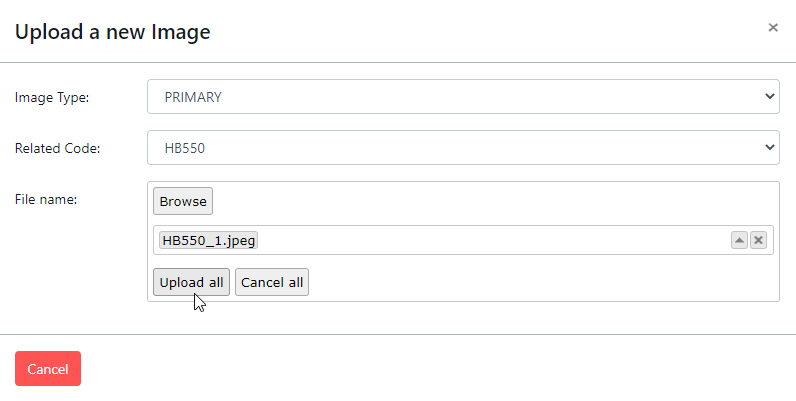
- Select the type of image you are uploading.
- Select the 'Code' to link the image too, either the Style or a Colour.
- Click 'Browse' and select the image you're uploading.
- With the correct file listed, click 'Upload All'
URL Entry
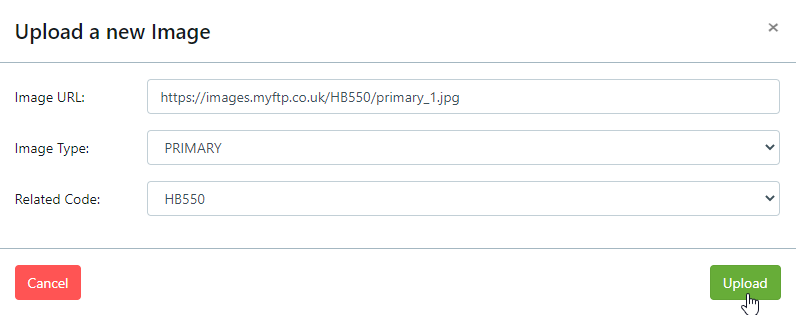
- Enter you fully formed Image URL.
- Select the type of image you are uploading.
- Select the 'Code' to link the image too, either the Style or a Colour.
- Click Upload
Mark for Upload
With the basic product detail and images in place, your product is now ready for approval.
Approval, or marking for upload, is applied at the colour level, meaning each unique colour for your product is approved individually, allowing you to upload a subset of your products colours, if desired.
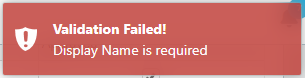
The approval process will also validate your entered enrichment information against the Hosts minimum requirements. Your sponsor may also have requirements for your enrichment which you will need to ensure you are following.
- To mark a colour as approved, tick the 'Approved' column for you desired colour.
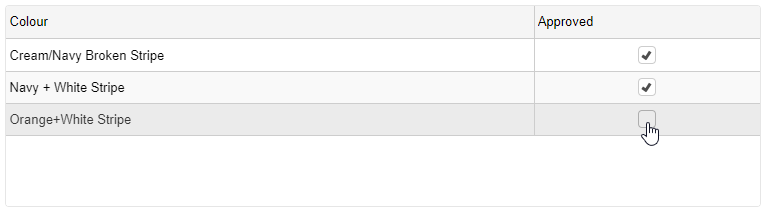
- This will validate your entered data, informing you any missing / incorrect information as seen below.
- If your product passes validation, you will see your colour checked as approved.