Product
Actions - File Upload
Product Data
- Click Actions > File Upload > Product
- In the following screen, select the Brand you wish to upload new Product data for.
- Click browse and select your product import file, for instructions on creating this file please see Product File Upload
- With the correct file listed, click Upload All
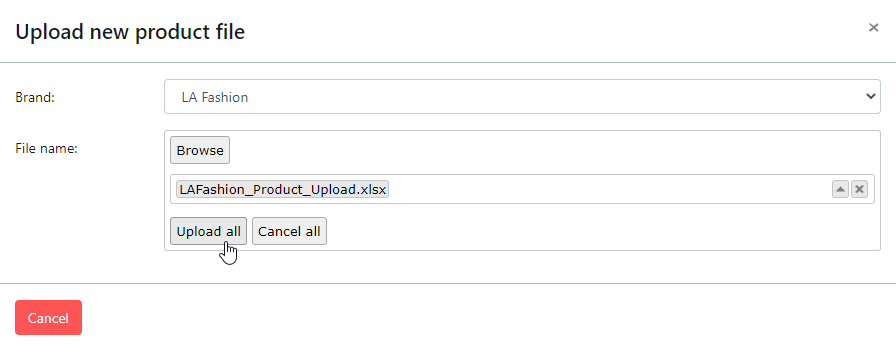
- Your file has now entered a processing queue. Once your file has been processed you will recieve a Notification informing you of its status.
Image Data
- Click Actions > File Upload > Image
- In the following screen, select the Brand you wish to upload new Image data for.
- Click browse and select your image import file, for instructions on creating this file please see Image File Upload
- With the correct file listed, click Upload All
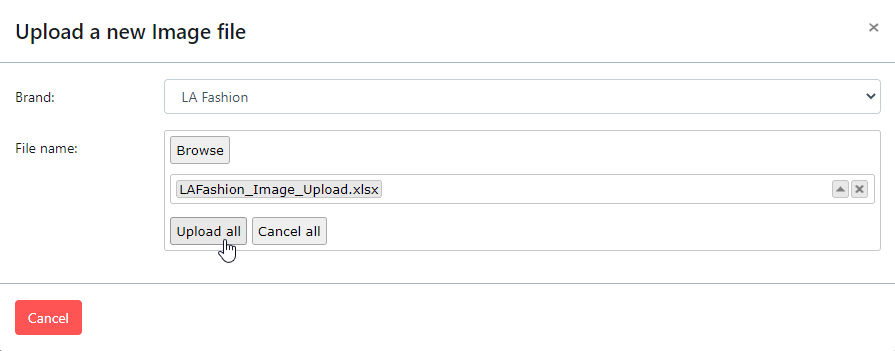
- Your file has now entered a processing queue. Once your file has been processed you will recieve a Notification informing you of its status.
Stock Data
- Click Actions > File Upload > Stock
- In the following screen, select the Brand you wish to upload new Stock data for.
- Select the Warehouse you wish to upload new Stock data for.
- Click browse and select your stock import file, for instructions on creating this file please see Stock File Upload
- With the correct file listed, click Upload All
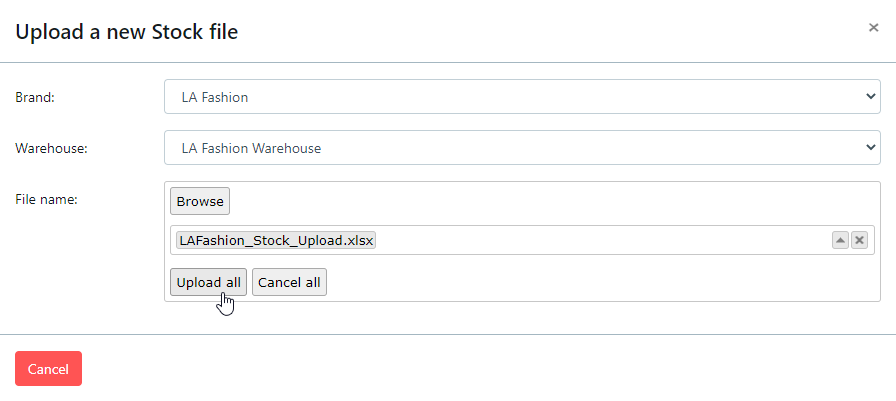
- Your file has now entered a processing queue. Once your file has been processed you will recieve a Notification informing you of its status.
Actions - Queue for Enrichment
The specifics of the Queue for Enrichment process have been documented in our Enrichment section, please see Queue for Enrichment for more information.
To find products that you have not yet Queued for enrichment use the Products not Queued for Enrichment in the Query menu.
Product Detail
The product detail screen is accessed by double clicking any product in the data listing.
Here you can make ammendments to the basic product information uploaded via the Product Data Upload
The tabbed area gives you listings containing this product's related Variants, Images, Prices and Stock records.

Query
It is possible to carry out various searches within the product listing. These ioptions are outlined below.
General Search
The general search screen for products is shown below
Advanced Search
The advanced search editor is available to do more complex searches on the product data. This is an expert tool and as such may require additional training to use. The basics are described in the Query Editor section.
Products not Queued for Enrichment
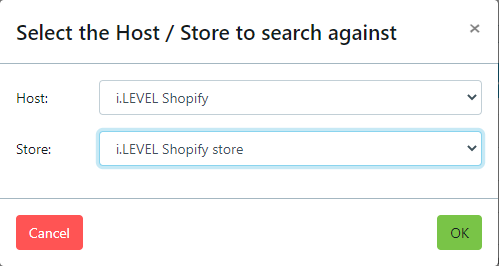
This is a specific query function to find products that have not yet been pushed to a host or web store. When chosen a screen will appear for the user to select the host and store they want to find products that have not been Queued for Enrichment
Print - Export Selected Products
To Excel
This exports the selected products and downloads an excel file. The format of this file is explained in the Advanced - Product Export Excel section.
To JSON
This exports the selected products and downloads a JSON format file. An example of this is shown in the Advanced - Product Export JSON section.
Product Deletion
Product deletion is possible as long as the product has not been enriched and uploaded to the host web platform or the host has removed the product from their platform. The following guide takes you through the steps to delete products.
Product deletion cannot be undone. Any deleted products will have to be recreated by upload or other means.
STEP 1 – Go to the Products section
Go to the ‘Productions’ section:

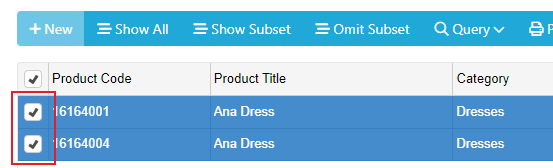
STEP 2 – Select the products you want to delete
Select the products you want to delete:
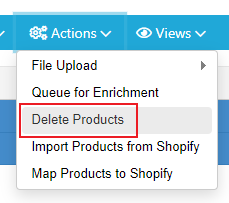
STEP 3 – Submit the delete request
Select ‘Delete Products’ from the ‘Actions’ menu:
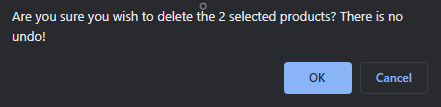
A dialog box will open, informing you of the number of products you’ve selected to delete, and asking to confirm (click ‘OK’), or ‘Cancel’:
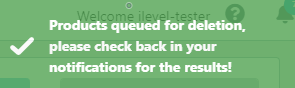
Assuming you click ‘OK’, you will see a message in the top-right informing you that products have been queued for deletion, and to check notifications for results:
STEP 4 – Check notifications and results
Check your notifications (the bell icon, top right) for completion of the delete request:
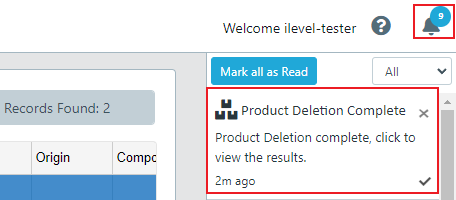
And then click on the notification text to view results. The results screen looks like this:
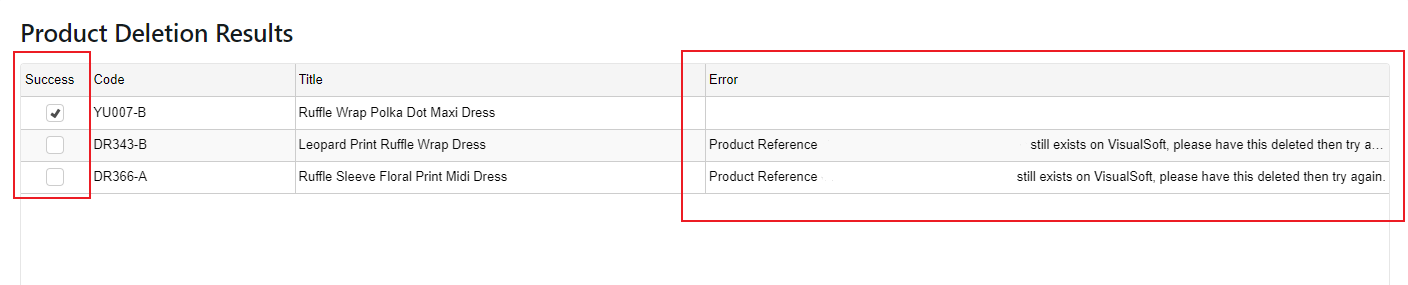
A tick against the product in the ‘Success’ column means the product has been deleted from i.LEVEL Connect.
A message in the ‘Error’ column means the product has not been deleted from i.LEVEL Connect. The most common cause is that the product still exists on a host ecomm platform, and you must therefore contact your partner sponsor to ask them to delete the product from the host ecomm platform first. Once they have done that you will be able to delete the product from i.LEVEL Connect. Please note there is no automated communication in i.LEVEL Connect that a product has been deleted from the host ecomm platform – it is the responsibility of your partner sponsor to inform you of this.